6.3 KiB
| stage | group | info | type |
|---|---|---|---|
| Verify | Pipeline Authoring | To determine the technical writer assigned to the Stage/Group associated with this page, see https://about.gitlab.com/handbook/engineering/ux/technical-writing/#assignments | reference |
Pipeline Editor (FREE)
- Introduced in GitLab 13.8.
- Feature flag removed in GitLab 13.10.
WARNING: This feature might not be available to you. Check the version history note above for details.
The pipeline editor is the primary place to edit the GitLab CI/CD configuration in
your .gitlab-ci.yml file. To access it, go to CI/CD > Editor.
From the pipeline editor page you can:
- Validate your configuration syntax while editing the file.
- Do a deeper lint of your configuration, that verifies it with any configuration
added with the
includekeyword. - See a visualization of the current configuration.
- View an expanded version of your configuration.
- Commit the changes to a specific branch.
NOTE:
You must already have a .gitlab-ci.yml file
on the default branch of your project to use the editor.
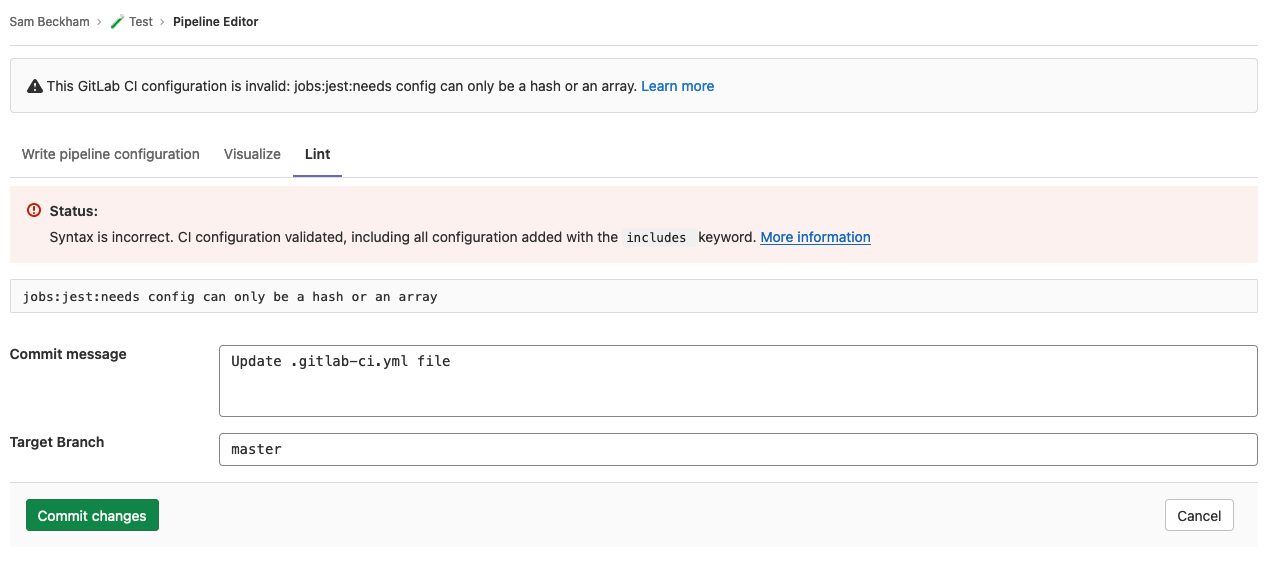
Validate CI configuration
As you edit your pipeline configuration, it is continually validated against the GitLab CI/CD pipeline schema. It checks the syntax of your CI YAML configuration, and also runs some basic logical validations.
The result of this validation is shown at the top of the editor page. If your configuration is invalid, a tip is shown to help you fix the problem:

Lint CI configuration
To test the validity of your GitLab CI/CD configuration before committing the changes, you can use the CI lint tool. To access it, go to CI/CD > Editor and select the Lint tab.
This tool checks for syntax and logical errors but goes into more detail than the automatic validation in the editor.
The results are updated in real-time. Any changes you make to the configuration are reflected in the CI lint. It displays the same results as the existing CI Lint tool.
Visualize CI configuration
- Introduced in GitLab 13.5.
- Moved to CI/CD > Editor in GitLab 13.7.
- It was deployed behind a feature flag, disabled by default.
- Became enabled by default in GitLab 13.8.
- It's enabled on GitLab.com.
- It's recommended for production use.
- To use it in GitLab self-managed instances, ask a GitLab administrator to enable it. (FREE SELF)
WARNING: This feature might not be available to you. Check the version history note above for details.
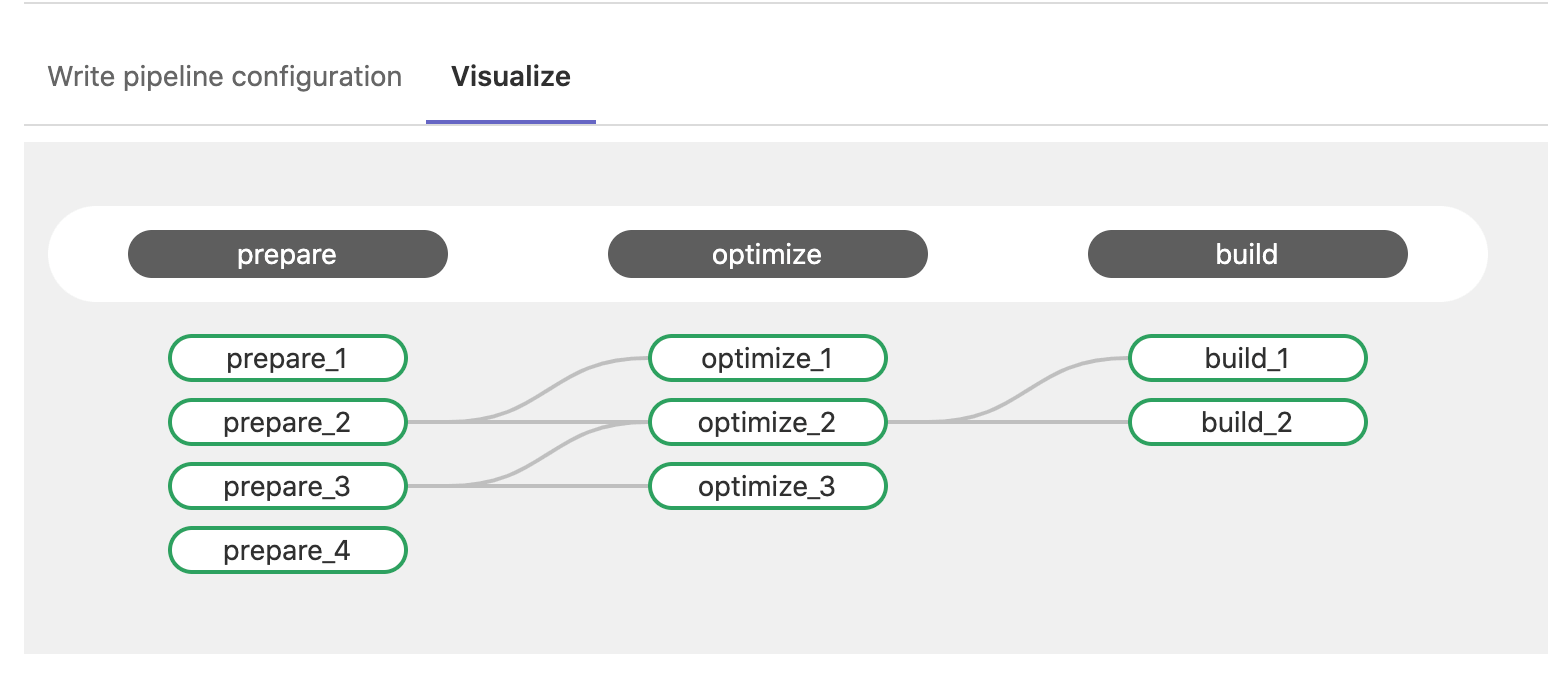
To view a visualization of your gitlab-ci.yml configuration, in your project,
go to CI/CD > Editor, and then select the Visualize tab. The
visualization shows all stages and jobs. Any needs
relationships are displayed as lines connecting jobs together, showing the
hierarchy of execution:
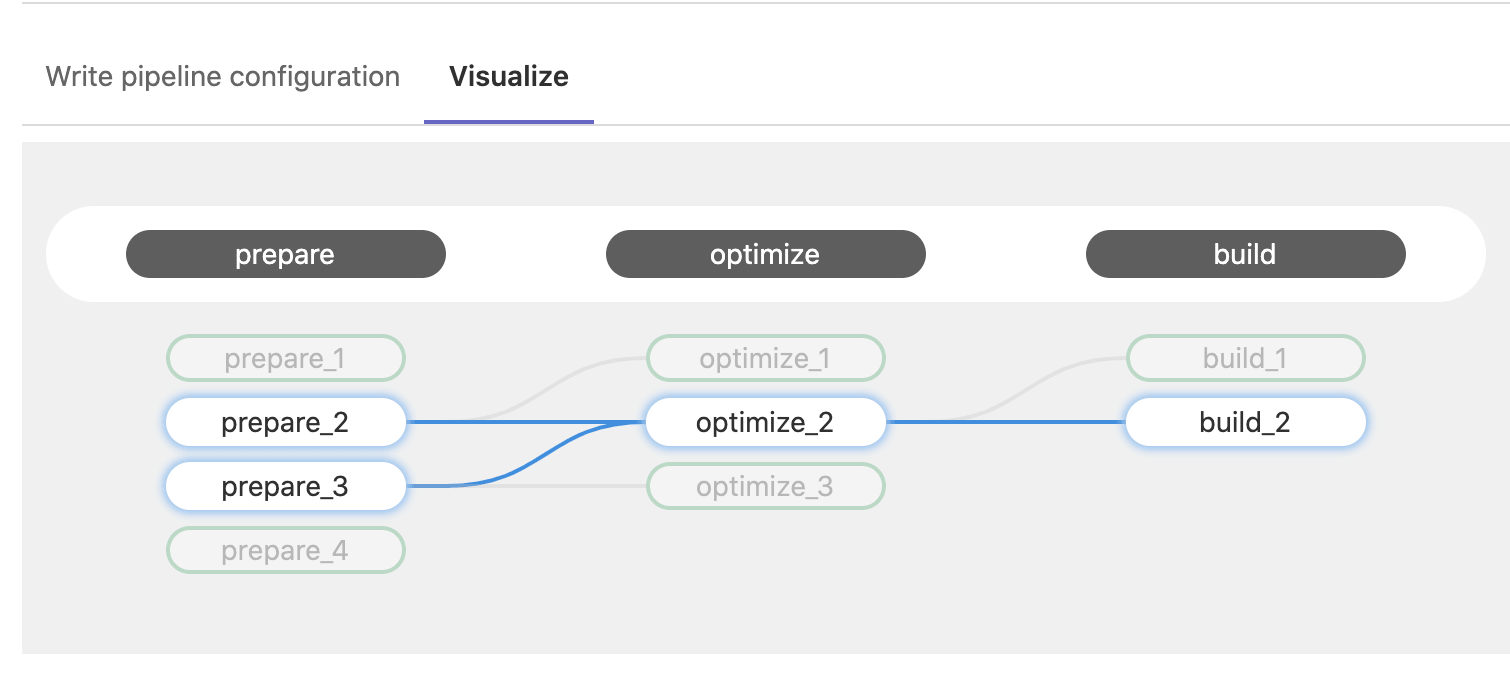
Hover over a job to highlight its needs relationships:
If the configuration does not have any needs relationships, then no lines are drawn because
each job depends only on the previous stage being completed successfully.
Enable or disable CI/CD configuration visualization (FREE SELF)
CI/CD configuration visualization is under development but ready for production use. It is deployed behind a feature flag that is enabled by default. GitLab administrators with access to the GitLab Rails console can opt to disable it.
To disable it:
Feature.disable(:ci_config_visualization_tab)
To enable it:
Feature.enable(:ci_config_visualization_tab)
View expanded configuration
- Introduced in GitLab 13.9.
- It is deployed behind a feature flag, enabled by default.
- To use it in GitLab self-managed instances, ask a GitLab administrator to enable it. (FREE SELF)
To view the fully expanded CI/CD configuration as one combined file, go to the pipeline editor's View merged YAML tab. This tab displays an expanded configuration where:
- Configuration imported with
includeis copied into the view. - Jobs that use
extendsdisplay with the extended configuration merged into the job. - YAML anchors are replaced with the linked configuration.
Enable or disable expanded configuration (FREE SELF)
Expanded CI/CD configuration is under development and not ready for production use. It is deployed behind a feature flag that is enabled by default. GitLab administrators with access to the GitLab Rails console can opt to enable it.
To disable it:
Feature.disable(:ci_config_merged_tab)
To enable it:
Feature.enable(:ci_config_merged_tab)
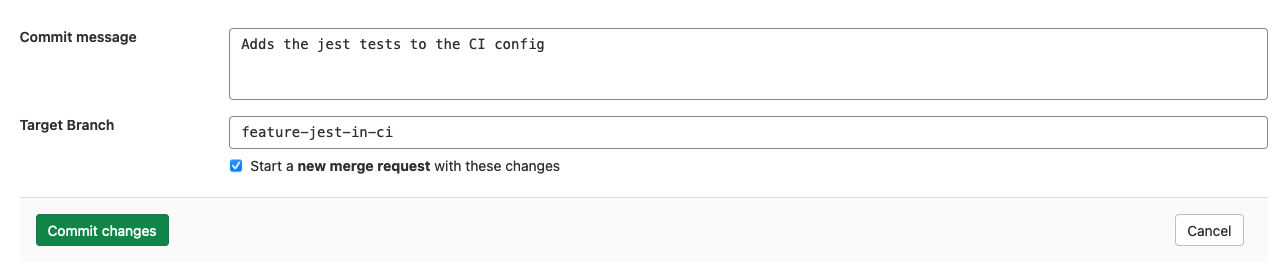
Commit changes to CI configuration
The commit form appears at the bottom of each tab in the editor so you can commit your changes at any time.
When you are satisfied with your changes, add a descriptive commit message and enter a branch. The branch field defaults to your project's default branch.
If you enter a new branch name, the Start a new merge request with these changes checkbox appears. Select it to start a new merge request after you commit the changes.