24 KiB
Auto DevOps
- Introduced in GitLab 10.0.
- Generally available on GitLab 11.0.
Auto DevOps provides pre-defined CI/CD configuration allowing you to automatically detect, build, test, deploy, and monitor your applications. Leveraging CI/CD best practices and tools, Auto DevOps aims to simplify the setup and execution of a mature and modern software development lifecycle.
Overview
You can spend a lot of effort to set up the workflow and processes required to build, deploy, and monitor your project. It gets worse when your company has hundreds, if not thousands, of projects to maintain. With new projects constantly starting up, the entire software development process becomes impossibly complex to manage.
Auto DevOps provides you a seamless software development process by automatically detecting all dependencies and language technologies required to test, build, package, deploy, and monitor every project with minimal configuration. Automation enables consistency across your projects, seamless management of processes, and faster creation of new projects: push your code, and GitLab does the rest, improving your productivity and efficiency.
For an introduction to Auto DevOps, watch AutoDevOps in GitLab 11.0.
Enabled by default
Introduced in GitLab 11.3.
Auto DevOps is enabled by default for all projects and attempts to run on all pipelines in each project. An instance administrator can enable or disable this default in the Auto DevOps settings. Auto DevOps automatically disables in individual projects on their first pipeline failure, if it has not been explicitly enabled for the project.
Since GitLab 12.7, Auto DevOps
runs on pipelines automatically only if a Dockerfile or matching buildpack
exists.
If a CI/CD configuration file is present in the project, it will continue to be used, whether or not Auto DevOps is enabled.
Quick start
If you're using GitLab.com, see the quick start guide for setting up Auto DevOps with GitLab.com and a Kubernetes cluster on Google Kubernetes Engine (GKE).
If you use a self-managed instance of GitLab, you must configure the Google OAuth2 OmniAuth Provider before configuring a cluster on GKE. After configuring the provider, you can follow the steps in the quick start guide to get started.
In GitLab 13.0 and later, it is possible to leverage Auto DevOps to deploy to AWS ECS.
Comparison to application platforms and PaaS
Auto DevOps provides features often included in an application platform or a Platform as a Service (PaaS). It takes inspiration from the innovative work done by Heroku and goes beyond it in multiple ways:
- Auto DevOps works with any Kubernetes cluster; you're not limited to running on GitLab's infrastructure. (Note that many features also work without Kubernetes).
- There is no additional cost (no markup on the infrastructure costs), and you can use a Kubernetes cluster you host or Containers as a Service on any public cloud (for example, Google Kubernetes Engine).
- Auto DevOps has more features including security testing, performance testing, and code quality testing.
- Auto DevOps offers an incremental graduation path. If you need advanced customizations, you can start modifying the templates without starting over on a completely different platform. Review the customizing documentation for more information.
Features
Comprised of a set of stages, Auto DevOps brings these best practices to your project in a simple and automatic way:
- Auto Build
- Auto Test
- Auto Code Quality (STARTER)
- Auto SAST (Static Application Security Testing) (ULTIMATE)
- Auto Dependency Scanning (ULTIMATE)
- Auto License Compliance (ULTIMATE)
- Auto Container Scanning (ULTIMATE)
- Auto Review Apps
- Auto DAST (Dynamic Application Security Testing) (ULTIMATE)
- Auto Deploy
- Auto Browser Performance Testing (PREMIUM)
- Auto Monitoring
As Auto DevOps relies on many different components, you should have a basic knowledge of the following:
Auto DevOps provides great defaults for all the stages; you can, however, customize almost everything to your needs.
For an overview on the creation of Auto DevOps, read more in this blog post.
NOTE: Note Kubernetes clusters can be used without Auto DevOps.
Requirements
Kubernetes
To make full use of Auto DevOps with Kubernetes, you need:
-
Kubernetes (for Auto Review Apps, Auto Deploy, and Auto Monitoring)
To enable deployments, you need:
-
A Kubernetes 1.12+ cluster for your project. The easiest way is to create a new cluster using the GitLab UI. For Kubernetes 1.16+ clusters, you must perform additional configuration for Auto Deploy for Kubernetes 1.16+.
-
NGINX Ingress. You can deploy it to your Kubernetes cluster by installing the GitLab-managed app for Ingress, after configuring GitLab's Kubernetes integration in the previous step.
Alternatively, you can use the
nginx-ingressHelm chart to install Ingress manually.NOTE: Note: If you use your own Ingress instead of the one provided by GitLab's managed apps, ensure you're running at least version 0.9.0 of NGINX Ingress and enable Prometheus metrics for the response metrics to appear. You must also annotate the NGINX Ingress deployment to be scraped by Prometheus using
prometheus.io/scrape: "true"andprometheus.io/port: "10254".
-
-
Base domain (for Auto Review Apps, Auto Deploy, and Auto Monitoring)
You need a domain configured with wildcard DNS, which all of your Auto DevOps applications will use. If you're using the GitLab-managed app for Ingress, the URL endpoint is automatically configured for you.
You must also specify the Auto DevOps base domain.
-
GitLab Runner (for all stages)
Your Runner must be configured to run Docker, usually with either the Docker or Kubernetes executors, with privileged mode enabled. The Runners don't need to be installed in the Kubernetes cluster, but the Kubernetes executor is easy to use and automatically autoscales. You can configure Docker-based Runners to autoscale as well, using Docker Machine.
If you've configured GitLab's Kubernetes integration in the first step, you can deploy it to your cluster by installing the GitLab-managed app for GitLab Runner.
Runners should be registered as shared Runners for the entire GitLab instance, or specific Runners that are assigned to specific projects (the default if you've installed the GitLab Runner managed application).
-
Prometheus (for Auto Monitoring)
To enable Auto Monitoring, you need Prometheus installed either inside or outside your cluster, and configured to scrape your Kubernetes cluster. If you've configured GitLab's Kubernetes integration, you can deploy it to your cluster by installing the GitLab-managed app for Prometheus.
The Prometheus service integration must be enabled for the project, or enabled as a default service template for the entire GitLab installation.
To get response metrics (in addition to system metrics), you must configure Prometheus to monitor NGINX.
-
cert-manager (optional, for TLS/HTTPS)
To enable HTTPS endpoints for your application, you must install cert-manager, a native Kubernetes certificate management controller that helps with issuing certificates. Installing cert-manager on your cluster issues a Let’s Encrypt certificate and ensures the certificates are valid and up-to-date. If you've configured GitLab's Kubernetes integration, you can deploy it to your cluster by installing the GitLab-managed app for cert-manager.
If you don't have Kubernetes or Prometheus installed, then Auto Review Apps, Auto Deploy, and Auto Monitoring are skipped.
After all requirements are met, you can enable Auto DevOps.
AWS ECS
Introduced in GitLab 13.0.
You can choose to target AWS ECS as a deployment platform instead of using Kubernetes.
To get started on Auto DevOps to ECS, you'll have to add a specific Environment Variable. To do so, follow these steps:
-
In your project, go to Settings > CI / CD and expand the Variables section.
-
Specify which AWS platform to target during the Auto DevOps deployment by adding the
AUTO_DEVOPS_PLATFORM_TARGETvariable. -
Give this variable the value
ECSbefore saving it.
When you trigger a pipeline, if you have AutoDev Ops enabled and if you have correctly entered AWS credentials as environment variables, your application will be deployed to AWS ECS.
NOTE: Note:
If you have both a valid AUTO_DEVOPS_PLATFORM_TARGET variable and a Kubernetes cluster tied to your project,
only the deployment to Kubernetes will run.
Auto DevOps base domain
The Auto DevOps base domain is required to use Auto Review Apps, Auto Deploy, and Auto Monitoring. You can define the base domain in any of the following places:
- either under the cluster's settings, whether for projects or groups
- or in instance-wide settings in {admin} Admin Area > Settings under the Continuous Integration and Delivery section
- or at the project level as a variable:
KUBE_INGRESS_BASE_DOMAIN - or at the group level as a variable:
KUBE_INGRESS_BASE_DOMAIN.
The base domain variable KUBE_INGRESS_BASE_DOMAIN follows the same order of precedence
as other environment variables.
TIP: Tip:
If you use the GitLab managed app for Ingress,
the URL endpoint should be automatically configured for you. All you must do
is use its value for the KUBE_INGRESS_BASE_DOMAIN variable.
NOTE: Note:
AUTO_DEVOPS_DOMAIN was deprecated in GitLab 11.8
and replaced with KUBE_INGRESS_BASE_DOMAIN, and removed in
GitLab 12.0.
Auto DevOps requires a wildcard DNS A record matching the base domain(s). For
a base domain of example.com, you'd need a DNS entry like:
*.example.com 3600 A 1.2.3.4
In this case, the deployed applications are served from example.com, and 1.2.3.4
is the IP address of your load balancer; generally NGINX (see requirements).
Setting up the DNS record is beyond the scope of this document; check with your
DNS provider for information.
Alternatively, you can use free public services like nip.io
which provide automatic wildcard DNS without any configuration. For nip.io,
set the Auto DevOps base domain to 1.2.3.4.nip.io.
After completing setup, all requests hit the load balancer, which routes requests to the Kubernetes pods running your application.
Enabling/Disabling Auto DevOps
When first using Auto DevOps, review the requirements to ensure all the necessary components to make full use of Auto DevOps are available. First-time users should follow the quick start guide.
GitLab.com users can enable or disable Auto DevOps only at the project level. Self-managed users can enable or disable Auto DevOps at the project, group, or instance level.
At the project level
If enabling, check that your project does not have a .gitlab-ci.yml, or if one exists, remove it.
- Go to your project's {settings} Settings > CI/CD > Auto DevOps.
- Select the Default to Auto DevOps pipeline checkbox to enable it.
- (Optional, but recommended) When enabling, you can add in the base domain Auto DevOps uses to deploy your application, and choose the deployment strategy.
- Click Save changes for the changes to take effect.
After enabling the feature, an Auto DevOps pipeline is triggered on the default branch.
At the group level
Introduced in GitLab 11.10.
Only administrators and group owners can enable or disable Auto DevOps at the group level.
When enabling or disabling Auto DevOps at group level, group configuration is implicitly used for the subgroups and projects inside that group, unless Auto DevOps is specifically enabled or disabled on the subgroup or project.
To enable or disable Auto DevOps at the group level:
- Go to your group's {settings} Settings > CI/CD > Auto DevOps page.
- Select the Default to Auto DevOps pipeline checkbox to enable it.
- Click Save changes for the changes to take effect.
At the instance level (Administrators only)
Even when disabled at the instance level, group owners and project maintainers can still enable Auto DevOps at the group and project level, respectively.
- Go to {admin} Admin Area > Settings > Continuous Integration and Deployment.
- Select Default to Auto DevOps pipeline for all projects to enable it.
- (Optional) You can set up the Auto DevOps base domain, for Auto Deploy and Auto Review Apps to use.
- Click Save changes for the changes to take effect.
Enable for a percentage of projects
You can use a feature flag to enable Auto DevOps by default to your desired percentage
of projects. From the console, enter the following command, replacing 10 with
your desired percentage:
Feature.get(:force_autodevops_on_by_default).enable_percentage_of_actors(10)
Deployment strategy
Introduced in GitLab 11.0.
You can change the deployment strategy used by Auto DevOps by going to your project's {settings} Settings > CI/CD > Auto DevOps. The following options are available:
-
Continuous deployment to production: Enables Auto Deploy with
masterbranch directly deployed to production. -
Continuous deployment to production using timed incremental rollout: Sets the
INCREMENTAL_ROLLOUT_MODEvariable totimed. Production deployments execute with a 5 minute delay between each increment in rollout. -
Automatic deployment to staging, manual deployment to production: Sets the
STAGING_ENABLEDandINCREMENTAL_ROLLOUT_MODEvariables to1andmanual. This means:masterbranch is directly deployed to staging.- Manual actions are provided for incremental rollout to production.
Using multiple Kubernetes clusters (PREMIUM)
When using Auto DevOps, you can deploy different environments to different Kubernetes clusters, due to the 1:1 connection existing between them.
The template used by Auto DevOps currently defines 3 environment names:
review/(every environment starting withreview/)stagingproduction
Those environments are tied to jobs using Auto Deploy, so
except for the environment scope, they must have a different deployment domain.
You must define a separate KUBE_INGRESS_BASE_DOMAIN variable for each of the above
based on the environment.
The following table is an example of how to configure the three different clusters:
| Cluster name | Cluster environment scope | KUBE_INGRESS_BASE_DOMAIN variable value |
Variable environment scope | Notes |
|---|---|---|---|---|
| review | review/* |
review.example.com |
review/* |
The review cluster which runs all Review Apps. * is a wildcard, used by every environment name starting with review/. |
| staging | staging |
staging.example.com |
staging |
(Optional) The staging cluster which runs the deployments of the staging environments. You must enable it first. |
| production | production |
example.com |
production |
The production cluster which runs the production environment deployments. You can use incremental rollouts. |
To add a different cluster for each environment:
-
Navigate to your project's {cloud-gear} Operations > Kubernetes.
-
Create the Kubernetes clusters with their respective environment scope, as described from the table above.
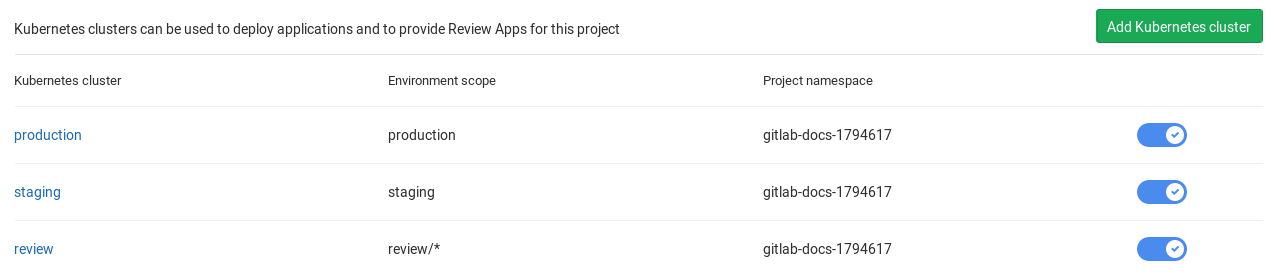
-
After creating the clusters, navigate to each cluster and install Helm Tiller and Ingress. Wait for the Ingress IP address to be assigned.
-
Make sure you've configured your DNS with the specified Auto DevOps domains.
-
Navigate to each cluster's page, through {cloud-gear} Operations > Kubernetes, and add the domain based on its Ingress IP address.
After completing configuration, you can test your setup by creating a merge request
and verifying your application is deployed as a Review App in the Kubernetes
cluster with the review/* environment scope. Similarly, you can check the
other environments.
Currently supported languages
Note that not all buildpacks support Auto Test yet, as it's a relatively new enhancement. All of Heroku's officially supported languages support Auto Test. The languages supported by Heroku's Herokuish buildpacks all support Auto Test, but notably the multi-buildpack does not.
As of GitLab 10.0, the supported buildpacks are:
- heroku-buildpack-multi     v1.0.0
- heroku-buildpack-ruby      v168
- heroku-buildpack-nodejs    v99
- heroku-buildpack-clojure   v77
- heroku-buildpack-python    v99
- heroku-buildpack-java      v53
- heroku-buildpack-gradle    v23
- heroku-buildpack-scala     v78
- heroku-buildpack-play      v26
- heroku-buildpack-php       v122
- heroku-buildpack-go        v72
- heroku-buildpack-erlang    fa17af9
- buildpack-nginx            v8
If your application needs a buildpack that is not in the above list, you might want to use a custom buildpack.
Limitations
The following restrictions apply.
Private registry support
No documented way of using private container registry with Auto DevOps exists. We strongly advise using GitLab Container Registry with Auto DevOps to simplify configuration and prevent any unforeseen issues.
Installing Helm behind a proxy
GitLab does not support installing Helm as a GitLab-managed App when
behind a proxy. Users who want to do so must inject their proxy settings
into the installation pods at runtime, such as by using a
PodPreset:
apiVersion: settings.k8s.io/v1alpha1
kind: PodPreset
metadata:
  name: gitlab-managed-apps-default-proxy
  namespace: gitlab-managed-apps
spec:
   env:
    - name: http_proxy
      value: "PUT_YOUR_HTTP_PROXY_HERE"
    - name: https_proxy
      value: "PUT_YOUR_HTTPS_PROXY_HERE"
Troubleshooting
Unable to select a buildpack
Auto Build and Auto Test may fail to detect your language or framework with the following error:
Step 5/11 : RUN /bin/herokuish buildpack build
 ---> Running in eb468cd46085
    -----> Unable to select a buildpack
The command '/bin/sh -c /bin/herokuish buildpack build' returned a non-zero code: 1
The following are possible reasons:
- Your application may be missing the key files the buildpack is looking for.
Ruby applications require a
Gemfileto be properly detected, even though it's possible to write a Ruby app without aGemfile. - No buildpack may exist for your application. Try specifying a custom buildpack.
Mismatch between testing frameworks
Auto Test may fail because of a mismatch between testing frameworks. In this
case, you may need to customize your .gitlab-ci.yml with your test commands.
Pipeline that extends Auto DevOps with only / except fails
If your pipeline fails with the following message:
Found errors in your .gitlab-ci.yml:

  jobs:test config key may not be used with `rules`: only
This error appears when the included job’s rules configuration has been overridden with the only or except syntax.
To fix this issue, you must either:
- Transition your
only/exceptsyntax to rules. - (Temporarily) Pin your templates to the GitLab 12.10 based templates.
Failure to create a Kubernetes namespace
Auto Deploy will fail if GitLab can't create a Kubernetes namespace and service account for your project. For help debugging this issue, see Troubleshooting failed deployment jobs.