1.9 KiB
Atlassian Crowd OmniAuth Provider
Configure a new Crowd application
-
Choose 'Applications' in the top menu, then 'Add application'.
-
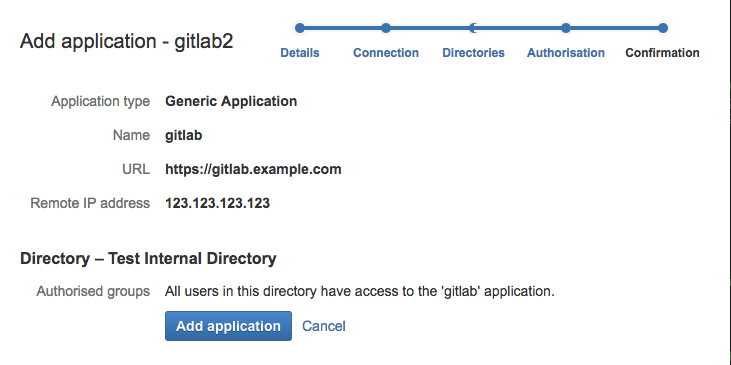
Go through the 'Add application' steps, entering the appropriate details. The screenshot below shows an example configuration.
Configure GitLab
-
On your GitLab server, open the configuration file.
Omnibus:
sudo editor /etc/gitlab/gitlab.rbSource:
cd /home/git/gitlab sudo -u git -H editor config/gitlab.yml -
See Initial OmniAuth Configuration for initial settings.
-
Add the provider configuration:
Omnibus:
  gitlab_rails['omniauth_providers'] = [
    {
      "name" => "crowd",
      "args" => {
        "crowd_server_url" => "CROWD_SERVER_URL",
        "application_name" => "YOUR_APP_NAME",
        "application_password" => "YOUR_APP_PASSWORD"
      }
    }
  ]
Source:
- { name: 'crowd', args: { crowd_server_url: 'CROWD_SERVER_URL', application_name: 'YOUR_APP_NAME', application_password: 'YOUR_APP_PASSWORD' } } -
Change
CROWD_SERVER_URLto the URL of your Crowd server. -
Change
YOUR_APP_NAMEto the application name from Crowd applications page. -
Change
YOUR_APP_PASSWORDto the application password you've set. -
Save the configuration file.
-
Reconfigure or restart for the changes to take effect if you installed GitLab via Omnibus or from source respectively.
On the sign in page there should now be a Crowd tab in the sign in form.
